I new that the new board would be not as easy to setup as the old board. Just plugin the board to the PC gave me my first problem. If you plan to buy this board follow the next steps.
- Download the Arduino v1.0.4 (or higher) software from http://arduino.cc/en/Main/Software and unzip all files to your harddrive (let's say c:\temp). Then launch the arduino application to check if it works fine.
- Download the Multiwii v2.1 (or higher) software from http://code.google.com/p/multiwii/downloads/list and unzip all files to your harddrive (let's say c:\temp).
- Connect the NanoWii board via usb to your pc. Your pc will look for a driver but will not find a suitable driver. If you have a windows operating system you can manually update/install the correct driver via the device manager in your control panel. In the device manager you will have to look for "arduino leonarde" click right on this item and choose update driver. Now you have to manually update the drivers by finding them in the "(c:\temp\) arduino-1.0.4\drivers" folder
- When the driver is correctly installed the "NanoWii board" AKA "arduino leonarde" will register itself as a Serial COM port. In the device manager you can see the exact COMxx port it uses. (on my system its com15 but on your system it will be somthing else)
 - Now you can start the arduino software and open the MultiWii firmware. The firmware is located in the "(c:\temp\) multiwii\multiwii" folder. Open the multiwii.ino file. Now you have to change the config.h tab (file). I advice reading http://www.multiwii.com/wiki/index.php?title=Config.h before adapting the config.h file. For this NanoWii board in standard configuration you will not have to do much configuration. Define your type of multicopter and define the NANOWII fc board.
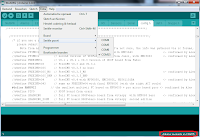
- After you have correctly configured the config.h tab save the project and make sure that your arduino application is set to "arduino leonarde" in the extra/board menu and to the corresponding COMxx port in the extra/serialport menu. Then click on upload. When the firmware is succesfully uploaded you can close the arduino application.
- Open the "(c:\temp\) multiwii\multiwiiconf" folder. In this folder you will find the MultiWii configuration application. But you first have to choose the correct application e.g. "application.windows32". Then go inside this folder and copy all files and subfolders. Go to your "(c:\temp\) arduino-1.0.4\java\bin" folder and paste all these files into this folder.
- Then start the "multiwiiconf.exe" application. Select the com port of your NanoWii board (aka arduino leonardo). The application will connect to your NanoWii board and a lot of buttons will become green. If you push the start button data will be read from the board.
!!! If you have a windows 7 64bit OS you might encounter the same bug as I have. The Multiwii application starts up. You can select the exact com port, but "no" data can be read from the board and all buttons stay red. Close the application, go to your explorer locate the "(c:\temp\) arduino-1.0.4\java\bin\javaw.exe" file click right, properties, compatibility and set to "windows xp sp3". Do the same for the "multiwiiconf.exe" file and restart the application.
No comments:
Post a Comment